So you want to dominate the arena and prove you’re the best of the best? If you want to survive in Apex Legends then you’ll need to master a plethora of different mechanics and gameplay concepts. This game can be quite brutal, especially if you are brand new to the battle royale genre. Boasting 12 characters, each with their own unique playstyles and abilities, there’s a lot to take in.
Whether you’re brand new or a returning player, here are 50 Apex Legends tips that will help you own your journey to number one. Keep in mind, we will not be going over very basic concepts such as pinging or general movement; any FPS player will know those already.
We will start with a couple of general tips and then dive into each of the 12 legends.
See Also: Valorant Tips
General
1. Know the Meta
If you plan on climbing the ranked ladder then it’s important to know who are the most picked characters. Gibraltar, Wraith, Pathfinder, and Wattson are some of the most popular legends right now thanks to their sheer utility. While you can certainly climb with anyone, these are characters you should practice fighting against.
2. Know When to Stop Looting
This is a habit that people have a hard time breaking – especially in lower ranks. While it’s always good to search for ammo, meds, and grenades sometimes it’s simply unnecessary. You will always put yourself at risk when you’re scavenging since your attention is elsewhere. If you have Level 3 armor and a fully kitted gun then there’s no reason to just run around opening chests. Also, remember that you have two other teammates, so take their needs into consideration also.
Bangalore
- Passive Ability – Double Time: Taking fire while springing makes you move faster for a brief time.
- Tactical Ability – Smoke Launcher: Fire a high-velocity smoke canister that explodes into a smoke wall on impact.
- Ultimate Ability – Rolling Thunder: Call in an artillery strike that slowly creeps across the landscape.
3. Use Smoke Defensively
While Bangalore’s smoke grenades are great for blinding the enemy team, this ability is best used defensively. The wall of smoke she creates is dense, making it very difficult for enemies to see you without relying on a specific legend’s ability or a Digital Threat sight. However, the smoke works both ways and it can easily blind your teammates. Because of this, we recommend using the smoke to either heal, revive, or finish downed opponents.
It’s not solid cover, but most people won’t go wading through smoke unless they’re sure of where you’re at. Try to always save at least one charge for when you or an ally needs to back off from a firefight. That being said, if you do grab a Digital Threat, go to town on your enemies and smoke them in every engagement so you can get some quick, easy kills.
4. Rolling Thunder is a Zoning Ultimate Not a Damage Ultimate
I see this mistake a lot from new players. They throw out Rolling Thunder hoping it can secure a ton of kills because it’s a massive airstrike. The reality is Bangalore’s ultimate only deals 40 damage per explosion. Even though it does stun opponents, this ultimate isn’t reliable for securing kills unless you know an enemy team is weak. Instead, treat Bangalore’s ultimate as a way to force teams off the high ground, into open terrain, or away from your squad. Your ultimate is great for countering aggressive teams or ones that are well dug in that don’t have a Wattson.
5. Don’t Underestimate Double Time
Bangalore’s passive may seem simple, but it’s incredibly potent if used correctly. When activated, she will receive a 30% speed boost which gives her great retreating or pushing power. Even if Bangalore isn’t hit, she will still receive the Double Time bonus. This passive is great for pressuring enemies or flanking them in hectic firefights. Make the most of Double Time and combine it with your Smoke Launcher to become a very tricky target to track.
6. Grenades and Smoke are Best Friends
If you do want to use your smoke aggressively, consider stocking up on some explosives. Enveloping a team in smoke followed by a barrage of grenades can quickly harm or down an entire team. If the explosions don’t do any damage you’ll at least force them either to your squad, our of cover, or away from the action. Consider doing this if the circle is close so you can force them into the ring.
Bloodhound
- Passive Ability – Tracker: See the tracks left by your foes.
- Tactical Ability – Eye of the Allfather: Briefly reveal hidden enemies, traps, and clues throughout the structure in front of you.
- Ultimate Ability – Beast of the Hunt: Enhances your senses, allowing you to move faster and highlighting your prey.
7. Use Beast of the Hunt to Chase Enemies
Beast of the Hunt should be used aggressively when fights break out to secure an advantageous position. Not only does it let Bloodhound move faster, but you’ll be able to see your foes and their tracks. Because of this, use Bloodhound to chase down enemies that are attempting to either flee or heal. Since your opponents are highlighted in red, it’s nearly impossible for someone to hide from Bloodhound. Alternatively, if someone is outright fleeing the battle, Bloodhound can make quick work of them.
8. Learn to Read the Signs
One of the most important aspects of playing Bloodhound is understanding how to read and follow tracks. Bloodhound can not only see a foe’s movements but know how long ago those tracks were made. Understanding the timer is key since it will give you a better of idea if there are any enemies around. If you find a footstep that was made 90 seconds ago, chances are that the team isn’t around anymore. Inversely, if you see one that was made 20-30 seconds ago then it’s safe to assume that group is either still around or you’re hot on their heels.
9. Your Tactical Only Highlights What’s in Front of You
A common misconception made by new Bloodhound players is that their Tactical Ability highlights everything in a 360-degree radius around you. This is not the case, as it will only target enemies or traps within 180-degrees of the direction you’re looking. Keep this in mind when you are trying to locate targets in a building. Don’t forget, opponents can see your scan so if you’re trying to sneak up on someone don’t use your Tactical Ability.
10. Beast of the Hunt is Great for Sniping
If you consider yourself a crack shot then consider using Beast of the Hunt to snipe enemies. Since your entire screen is switched to a grayscale except for enemies, it’s extremely easy to track a target – even through dense terrain. This is useful for picking off a foe before your team engages in a fight. Just make sure you can actually hit your target otherwise this is a complete waste of an ultimate.
Caustic
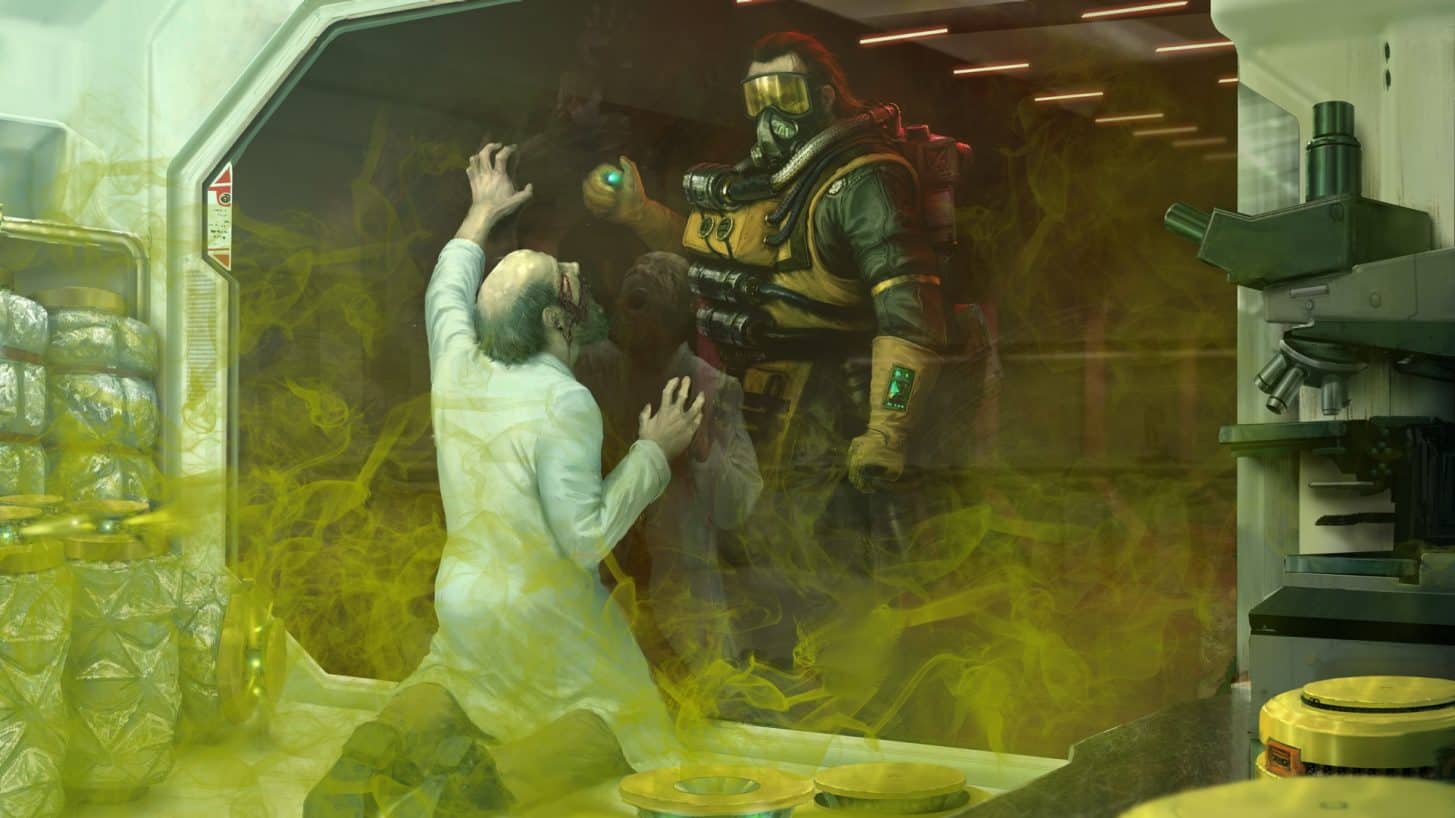
- Passive Ability – Nox Vision: Allows you to see enemies through your gas.
- Tactical Ability – Nox Gas Trap: Drop canisters that release deadly Nox gas when shot or triggered by enemies.
- Ultimate Ability – Nox Gas Grenade: Blankets a large area in Nox gas.
11. Your Gas Traps Block Doors
If you’re even remotely familiar with Caustic then you know by now that trapping someone in a room and using your Nox Gas Grenade typically results in a kill. Yet, the ability to block doors should be used defensively as well. If you need to heal, run into a room, drop a trap in front of the door, and begin healing. This forces your opponent to either find another entrance or break the door down, triggering the trap and giving you a chance to retaliate.
12. Nox Gas Can be Used Defensively
Despite Nox Gas being detrimental to everyone but Caustic players, this poison is surprisingly decent cover if you need to revive someone. Rarely will enemies push into a cloud of Nox Gas unless they are absolutely positive that they can secure the kill. This makes Caustics gas great for reviving downed teammates or offering cover to heal in. If you see someone go down in a hectic fight, toss that gas grenade on them and run in for the heal. Just remember, if the enemy also has a Caustic he will be unaffected by the gas.
13. Don’t Haphapzardly Throw Gas Traps
Caustic’s Gas Traps are extremely deadly, but they can be used for more than just locking down an area. Both World’s Edge and King’s Canyon have a ton of narrow passageways that players have to navigate. If you’re rotating and unsure if someone’s behind you then hide a trap at the exit of any chokepoints. You can also use Gas Traps as pop-up cover if you’re in a close to mid-range battle. While the traps can be destroyed, most players will be too busy shooting at you to remove your cover.
14. Give Your Teammates the Digital Threat
I know, I know it’s unlucky that your team will fight directly in Nox Gas. However, the big reason for this is the gas obscures their vision making it difficult to track targets. If you’re playing Caustic, don’t hog the Digital Threat sight. Giving this to your teammates will allow them to confidently push into a gas cloud and secure kills. Additionally, both Bloodhound and Crypto are great legends to pair with Caustic. Gibraltar also has some fun synergy since players won’t push into his bubble if there’s a gas can inside.
Crypto
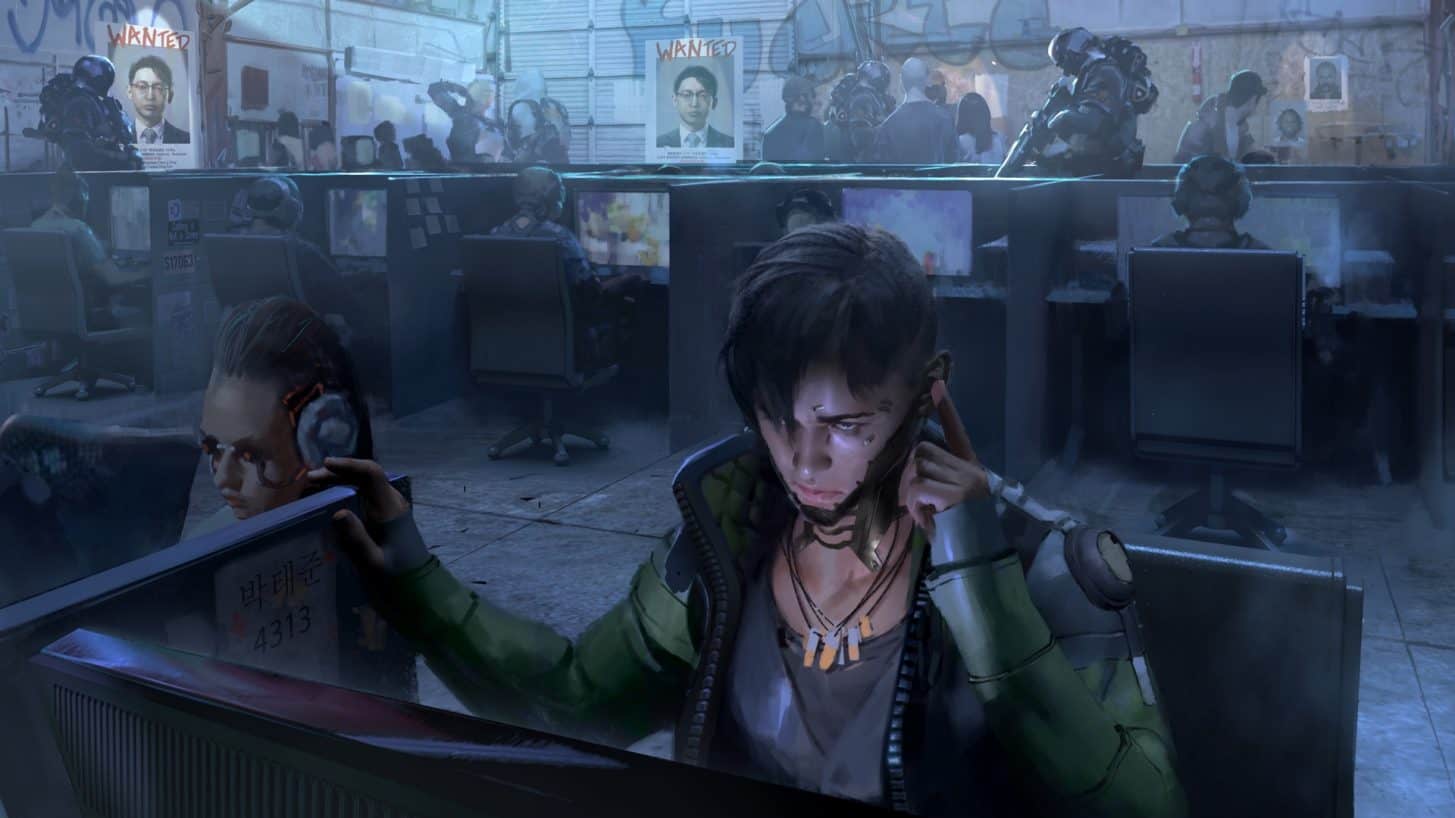
- Passive Ability – Neurolink: Enemies detected by the Surveillance Drone within 30 meters of your position are marked for you and your teammates to see.
- Tactical Ability – Surveillance Drone: Deploy an aerial drone that allows you to view the surrounding area from above. If the drone is destroyed, there is a forty-second cooldown before you can deploy another.
- Ultimate Ability – Drone EMP: Your Surveillance Drone sets off an EMP blast that deals shield damage, slows enemies, and disables traps.
15. Master Spying on Enemies With the Drone
Good drone usage is the key to being an effective Crypto player. While the drone highlights any enemies close to it, those targets will be altered to the drone’s presence. This typically causes them to shoot it down if you’re not actively dodging their bullets. Instead, if you are spying on a team, fly high up into the air and use the drone like a satellite. Not only will they not hear it, but you’ll be able to keep tabs on them. Only move the drone in range right before you engage or if they’re distracted.
16. Banners Are Your Best Friend
A mistake I see new Crypto players make is them not checking banners. Typically banners just tell you who the Champion or Kill Leader is. But when you’re in Crypto’s drone those banners are hacked to tell you how many hostile squads are within drone range. This lets you quickly evaluate if there are nearby foes when you’re entering a new area. As a Crypto main, I often find myself checking these banners whenever my squad rotates into a new location. If you’re in a popular point of interest then park your drone in front of the banner so you can periodically check if an enemy has made their way into your territory.
17. Know When to Use the EMP
Crypto’s EMP is extremely deadly. Not only does it deal a significant amount of shield damage, but it disables traps and drastically slows enemies. The problem is a lot of players EMP at the wrong time. Crypto’s EMP should be used as either an initiator to a fight or a way to punish aggressive teams. Do not EMP when you are far away since most players will heal before you can take advantage of your ultimate. Always make sure you’re within striking distance so the moment that EMP activates, your team can capitalize on their vulnerability.
18. Your Drone Does More Than Survey
Did you know that Crypto’s drone can pick up your team’s Banner Cards? This little drone is perfect for retrieving killed friendly cards without putting Crypto in any danger. You can also harass enemies with your drone by constantly flying around them. Since the drone takes a few well-placed shots to destroy, it’s easy to quickly take an enemy team’s focus away from looting or finding a better position. I like to use this tactic when the ring is smaller so the enemy gives away their position to not only my squad but all the remaining survivors. I’ve even managed to trigger a few battles between enemy teams by making it look as if one of my foes is the Crypto and not my squad.
Gibraltar

- Passive Ability – Gun Shield: Aiming down sights deploys a gun shield that blocks incoming fire.
- Tactical Ability – Dome of Protection: Throw down a dome-shield that blocks attacks for 18 seconds. Healing items are used 25% faster within the dome.
- Ultimate Ability – Defensive Bombardment: Call in a concentrated mortar strike on a marked position.
19. You Can Tank a Lot of Damage
Gibraltar is the closest thing that Apex Legends has to a tank class. Along with his Gun Shield, this hero has a 15% reduction to all incoming damage and isn’t slowed by bullets. This makes him an absolute powerhouse and one of the most difficult characters to kill in a duel. Capable of sustaining a lot of punishment, you shouldn’t be afraid to take fights with enemies in a 1v1 situation. Unless they are extremely accurate, there’s a good chance your shield will absorb a lot of the initial fire. Because of this, feel free to get in player’s faces and draw their attention away from your comrades.
20. Use Your Dome Aggressively
Gibraltar’s Dome is at its best when used to revive or quickly heal up during a fight. If you see a downed teammate, quickly toss the dome next to them to ensure that they aren’t finished off. Most players are hesitant about pushing into Gibraltar’s Dome, so use this to your advantage. You can also use the dome as partial protection if you need to retreat from a fight. Keep in mind the dome is quite big and very bright, so if you’re trying to go unnoticed don’t use this ability. Otherwise, feel free to aggressively use this skill to both push or disengage.
21. Learn to Shield Dance
One of the most important skills to learn as a Gibraltar player is how to “Shield Dance.” This term means weaving in and out of your dome when fighting opponents. The trick is to time stepping behind the shield when your foe fires and stepping out when you need this. This is best used with a shotgun like the Peacekeeper or Mastiff. It will take some time before you settle into a rhythm, so we encourage you to practice shield dancing whenever you’re in a close-range fight. Remember, you can always psyche an enemy out by moving to the outside of the shield, but not actually leaving. You want to make them waste their ammo so you can capitalize on their reload time.
22. Make Yourself Harder to Kill
As previously mentioned, Gibraltar is a tank. Yet, a smart player will know to go for either the head or the legs to maximize their damage against him. This makes waist-high cover perfect for Gibraltar since it covers up one of his most vulnerable areas. Also, consider crouching when it fights to not only minimize your hitbox but force enemies to shoot at your shield. These won’t guarantee you victory, but it will drastically increase your chances of surviving shootouts in confined spaces or if you’re jumped.
Lifeline
- Passive Ability – Combat Medic: Revive knocked down teammates faster while protected by a shield wall. Healing items are used 25% faster.
- Tactical Ability – D.O.C. Heal Drone: Call your Drone of Compassion to automatically heal nearby teammates over time.
- Ultimate Ability – Care Package: Call in a drop pod full of high-quality defensive gear.
23. Be Smart With Your Revives
Even though Lifeline can revive teammates quite quickly, you’ll want to be smart about where you pick them up. If you’re out in the open that Combat Medic shield will only protect your ally until they’re standing. Chances are if they’re not behind cover then your enemy will down them before they can heal themselves. Try your best to be behind actual cover when reviving some to ensure they have a safe place to recover lost shields and health.
24. Bait Opponents With Revives
One popular Lifeline strategy is to feign actually reviving your ally to draw out an opponent. Since the sound of her shield is very loud, this is a great trick for baiting an enemy to exit their cover. If you’re wearing headphones you can hear when someone is rushing towards you. Once they’re close, drop the shield and then open fire. It won’t catch everyone by surprise, but it’s excellent if you’re having trouble finding someone that’s hiding around you.
25. Care Packages Are Very Loud
While it’s good practice to call down your Care Package right away, it’s important to remember how loud and noticeable this ultimate is. A lot of players will rush towards the position of a Care Package, so set up a defensive ring around this item. If you have a Crypto then use his drone to keep an eye out for any enemies around you. Inversely, you can use the Care Package to set up a trap and catch unaware foes who think they just found free loot. Just make sure there isn’t any Level 3 Armor inside otherwise you might end up helping instead of hurting them!
26. Multitask When Using D.O.C.
Standing around and waiting for D.O.C. to heal you can be time-consuming and inefficient. This robot heals fairly slowly, so after a fight put this by a death box and start looting. D.O.C. will continue to heal you while you’re digging through your fallen foe’s inventory. Also, don’t wait for your health to get super low in a battle to drop D.O.C. Instead, put this robot behind cover right as a fight starts so you can focus on repairing shields while it takes care of your health.
Mirage
- Passive Ability – Encore!: Automatically drop a decoy and cloak for five seconds when knocked down.
- Tactical Ability – Psyche Out: Send out a holographic decoy to confuse the enemy.
- Ultimate Ability – Vanishing Act: Deploy a team of Decoys to distract enemies while you cloak.
27. Always Break Line of Sight
Mirage is a character that completely relies on deception. His clones can be pretty useless in combat if you just randomly toss them out during a fight. Clones are meant to draw your enemy’s eye away from you, opening them up for some quick damage. This cannot be achieved if they literally see you make the clone. Because of this, always try to fight behind cover that obscures your entire character model. This will make it difficult for your opponent to deduce which Mirage is the real one. If you’re just standing out in the open, your Psyche Out will do literally nothing but slightly block their vision of you for a split second.
28. Be Convincing With Your Clones
The difference between an okay and a great Mirage is how convincing their clones look in the heat of battle. It’s imperative that people think your clones are real, otherwise, what’s the entire point of his ability? If you’re trapped behind cover, don’t just launch this doppelganger out into the middle of a field. Send him towards cover and then use the brief window to reposition or strike back at your foe.
Another fun trick is if you’re looting a death box after a fight, put your clone either at another death box or on the other side of the one you’re going through. Mirage is all about confusing your foes, so put some thought into where you send out your clones. When you deploy a clone try to mimic their movement by running in a straight line to confuse your opponents.
29. Vanishing Act is Actually Really Good
This may surprise a lot of non-Mirage users, but Vanishing Act is a pretty insane ultimate if used correctly. Unlike Wraith, when Mirage goes invisible there is no trail to follow or way to track his movements normally. With the exception of Bloodhound, all other characters cannot do much but guess where the Mirage player is. This makes Vanishing Act surprisingly good at sneaking behind foes and shooting them from behind.
Given how open a lot of World’s Edge is, moving behind your enemy isn’t that difficult. When a fight breaks out, be proactive with your ultimate not defensive. Even though it can be used as a way to disappear from a battle, you’ll have more success if you become the aggressor.
30. Make the Most of Encore!
Let me be clear, Encore! is a really underwhelming passive. Turning invisible for five seconds after you’re downed typically won’t matter in a lot of fights, especially ones in confined areas. That being said, there are some ways to maximize the efficiency of this passive. Do not activate your shield or wander into water or dirt as this will give your position away. If possible, try to drop down onto a lower floor or wedge yourself under some stairs. You want to make the most of those five seconds, so don’t just sit there and watch.
Octane

- Passive Ability – Swift Mend: Automatically restores health over time.
- Tactical Ability – Stim: Move 30% faster for six seconds. Costs health to use.
- Ultimate Ability – Launch Pad: Deploy a jump pad that catapults teammates through the air.
31. Stim Cannot Kill You
Stim is far and away Octane’s best ability. Despite the health cost, obtaining a 30% speed boost is absolutely worth the price. This makes Stim an excellent escape ability, especially if you are low on health. Octane can never be killed or downed by overusing Stim, even if he’s at 1 HP. So if you’re super low on health, there’s no reason to not be stabbing yourself full of Stim. Not only will you be harder to hit, but you’ll be able to get behind cover to heal.
32. Heal When Using the Launch Pad
Yes, the Launch Pad is great for reaching higher areas, but it’s also perfect for when you need to retreat and regain shields. If you pop a Med Kit or Shield Battery when you launch into the air, there’s a decent chance it will either be close to or finished once you land. This is a great way to multitask when in a fight, especially a chaotic one where you’ll constantly find yourself on the move. Remember, you can also use the Launch Pad if you’re downed, so use this as a way to get yourself away from opponents trying to finish you off.
33. Balance Your Aggression
Just because you can run super-fast doesn’t mean you should always be pushing. This is a mentality that a lot of new Octane players struggle with because he is a very, very aggressive legend. However, charging straight into battle is a good way to get killed. Instead, use Stim to secure flanks or surprise your enemies from a different position.
34. Octane is Superb in the Early Game
Of all the legends, Octane is far and away one of the deadliest when a match begins. When you land, use Stim to quickly loot and attack enemies while they are still preparing. This lets you thin out the herd while collecting some additional gear. We recommend grabbing at least one decent weapon and at least a Level 1 Body Shield before attacking. Inversely, if someone grabs a gun before you then pop a Stim and run as fast as you can. Just be careful about using Stim when you don’t have armor.
Pathfinder
- Passive Ability – Insider Knowledge: Scan a survey beacon to reveal the ring’s next location.
- Tactical Ability – Grappling Hook: Grapple to get to out-of-reach places quickly.
- Ultimate Ability – Zipline Gun: Create a zipline for everyone to use.
35. Master the Grappling Hook
The single most important thing you need to do as a Pathfinder player is mastering the Grappling Hook. Pathfinder’s main mobility and offense tool is the Grappling Hook so you’ll want to become proficient with this gadget. This is a very versatile tool, allowing you to disengage, chase down enemies, scale terrain, and simply dodge incoming fire. For a more detailed breakdown of the individual grapples, we recommend The Gaming Merchant’s video tutorial.
36. Always Scan Survey Beacons
I have no idea why, but it seems like most new Pathfinder players are allergic to survey beacons. Sure, this passive isn’t that flashy, however, knowing where the next circle is could mean the difference between winning and losing. This is especially important near the end when playing outside of the safety circle is extremely dangerous. Scan survey beacons whenever possible and remember you can use the same one multiple times.
37. Zipline is Very Versatile
Zipline is a terrific ultimate that allows Pathfinder and his team to quickly relocate. This is a great tool for ambushing enemies or exiting a battle that’s turned sour. Don’t be stingy with your Zipline, as it’s one of the fastest charging ultimates in the entire game. Keep in mind, enemies can use your Zipline too so always look to see if you’re foe is following. You can also use the Zipline to trick your foes into thinking your team went one way so you can either escape or gun them down when they hop on.
38. Always Be Moving
Similar to legends like Wraith, Pathfinder takes 5% more damage than other characters. It’s important to remember this when you find yourself in intense gunfights. Try to always surprise your opponents by attacking from odd or different angles. You have some insane mobility, so there’s no reason not to use it. Never try to take one on one fights with legends like Gibraltar unless you have too.
Revenant
- Passive Ability – Stalker: You crouch-walk faster and can climb higher than other Legends.
- Tactical Ability – Silence: Throw a device that deals damage and disables enemy abilities for 10 seconds.
- Ultimate Ability – Death Totem: Drop a totem that protects those who use it from death for a set amount of time. Instead of being killed or downed, users will return to the totem.
39. Silence During, Not Before Fights
Unless you’re ambushing an unaware enemy, it’s almost always better to Silence someone in the middle of a fight. This is because most players won’t use their skills until their health gets low. Wraith, Octane, Gibraltar, and Pathfinder all rely on their disengage abilities to stay alive. Strip them of this with Silence for an easy kill. It’s also fine if you Silence yourself since you won’t be using any of your abilities at that point.
40. Crouch, Don’t Run
If you know there are enemies around then you shouldn’t be running as Revenant. One of his best traits is the ability to move silently and quickly around the map. This allows Revenant players to sneak up on unsuspecting enemies or ones engaged in a battle with another person. Given how important sound is in Apex Legends, you can easily catch users off-guard by skulking around them. His Stalker passive is also great for sneaking away from a battle to restore health and shields.
41. Hide Your Death Totem
Stop. Putting. Your. Death. Totem. Out. In. The. Open.
Even though you get an “extra life,” you shouldn’t haphazardly drop your Death Totem. Try to always position it so when you return you’ll have a safe place to heal. This also ensures that your enemies have a harder time finding it and setting a trap. Just remember, anyone can use your Death Totem so dropping it anywhere is asking for it to be used against you. I’ve found the best places to drop this ultimate is in buildings, under bridges, and behind large rocks
42. Don’t Forget to Climb
Another benefit from the Stalker passive is that Revenant can climb higher and faster than other Legends. You are more than capable of scaling areas that many assume are unreachable. Use this to your advantage to cut-off escape routes or ambush enemies that think their back is protected. You can also use his climb to juke anyone chasing you since most won’t look high above them.
Wattson
- Passive Ability – Spark of Genius: Ultimate Accelerants fully charge your Ultimate Ability, and standing near interception pylons boosts your Tactical Ability recharge.
- Tactical Ability – Perimeter Security: Connect nodes to create electrified fences that damage and slow enemies.
- Ultimate Ability – Interception Pylon: Place an electrified pylon that destroys incoming ordnance and repairs damaged shields as long as it stands.
43. Horde Ultimate Accelerants
Wattson’s ultimate is extremely powerful and being able to deploy it for every fight will give your team a massive advantage. To ensure you always have your Interception Pylon, make sure to horde at least two Ultimate Accelerants. Having your ultimate for the last few rings will give your team a much better chance at surviving. Make sure to have your teammates ping any Ultimate Accelerants they come across.
44. Fences Are For Zoning, Not Killing
Unlike Caustic’s Gas Traps, Watton’s fences are for deterring opponents away from specific entrances. Placing them along doors or chokepoints will force enemies to either take a lot of slow damage or find another way to you. Try to funnel your enemies into a single area when you are out in the open. Inversely, when securing a building block all the entrances and the stairs so it’s absolute hell for anyone to push inside.
45. Be Proactive With Your Interception Pylon
When you eventually find yourself in a fight don’t be afraid to just drop your Interception Pylon. People love to throw grenades, so it’s better to just drop your ultimate than wait and see. Since you can instantly get the pylon back, don’t feel as if you need to just hold this ultimate for the perfect opportunity. Sometimes the passive shield regeneration is more than enough to secure a few kills.
46. Hide Your Fence Nodes
Just like other traps, Watton’s fences can be destroyed by shooting the base. To make this tougher for your enemies,l try to hide the ends of the fence away from doors or windows. This will waste your foe’s time as they try to get an angle to destroy the fence, allowing you more time to retaliate. Additionally, you can make thin triangles in doorways so enemies have to deal with multiple fence ends or risk-taking double damage.
Wraith
- Passive Ability – Voice From the Void: A voice warns you when danger approaches. As far as you can tell, it’s on your side.
- Tactical Ability – Into the Void: Reposition quickly through the safety of void space, avoiding all damage.
- Ultimate Ability – Dimensional Rift: Link two locations with portals for 60 seconds, allowing your entire team to use them.
47. You Can Take Risky Fights
A good Wraith player is very difficult to hit thanks to her small hitbox and Tactical Ability. Use this to your advantage by always keeping mobile in fights. Since you’ll often be in an enemy’s face, use weapons such as the Peacekeeper, L-Star, R-99, and Prowler. These are superb close-range guns that can be easily hip-fired while you’re ducking, jumping and running circles around opponents. Remember to keep your Tactical Ability ready so you can quickly run away from a losing battle.
48. Run Outside the Circle
Unlike other legends, Wraith can safely traverse the circle with her Into the Void skill. This is an amazing trick for the last few circles when the cover is limited. Use this ability to silently sneak behind your foes without taking any damage. Try doing this once your opponent’s shields are cracked so you can catch them when their attention is on healing, not their surroundings. This also works for the lava in Lava Fissure, so if you need a quick escape hop into the fire and trigger Into the Void.
49. Use Portals for More Than Escaping
Typically, Wraith’s portals are used to simply transport your team from one location to another. Despite this being a critical part of Wraith’s kit, don’t discredit the advantages of using these aggressively. If you’re fighting in a building or space with a lot of verticality, considering placing a low and high portal. This allows you to quickly maneuver through a hectic fight and flank enemies. Alternatively, you can use these portals to trick teams that take them into a trap. Putting Watton’s fence through a portal will slow anyone who emerges, allowing you to easily kill someone.
50. Portals Are Good for Rescuing Teammates
If someone on your team is downed, drop a portal near them and run to cover. They can crawl through it to be instantly transported to the other side. This is one of the safest ways for someone to reach their teammates without risking their lives. We don’t always recommend using your portal for this, but it’s a handy tool that you should keep in mind.


