Whether you want to build a platform for showcasing your gaming skills, sharing reviews and insights, or even launching a gaming blog, having your own kick-ass gaming website can unlock a realm of possibilities. But if you’ve never created a blog before, you might find yourself wondering where to start or how to navigate the technical aspects of website creation. Fear not! In this comprehensive guide, I’ll walk you through the step-by-step process of making a gaming website that not only stands out in the crowded gaming community but also caters to your unique vision and audience.
From selecting the ideal domain name and hosting provider to crafting captivating content and optimizing your website for peak performance, we’ve got you covered. Allow me to demystify the process of creating an engaging and visually stunning gaming website that you can actually earn passive income from.
Jump To:
- Step 1: Define Your Niche
- Step 2: Domain and Hosting
- Step 3: Choosing a CMS
- Step 4: Design Your Site
- Step 5: Create Essential Pages
- Step 6: Content Creation and Strategy
- Step 7: How to Monetize Your Gaming Blog
- Step 8: Implementing SEO Best Practices
- Step 9: Setup Tracking and Monitoring Tools
- Step 10: Write Content, Content, And More Content
- What Do You Need for Gaming Videos?
- My Qualifications to Write This Article
- Tips and Things to Avoid
Step 1: Define Your Gaming Niche and Target Audience
Because of how competitive the video games niche is, creating a successful gaming website begins with defining your niche and understanding your target audience. Your niche is the specific area within the gaming world that your website will focus on.
Chances are that you already have a rough area you want to focus on in mind, which is definitely a great start; it’s crucial to select a niche that aligns with your passion and expertise, as this will not only make the process more enjoyable for you but also enable you to connect better with your audience.
If you already have an idea floating around in that video game-loving mind of yours, you might want to think about refining it some.
1. Research Different Gaming Niches
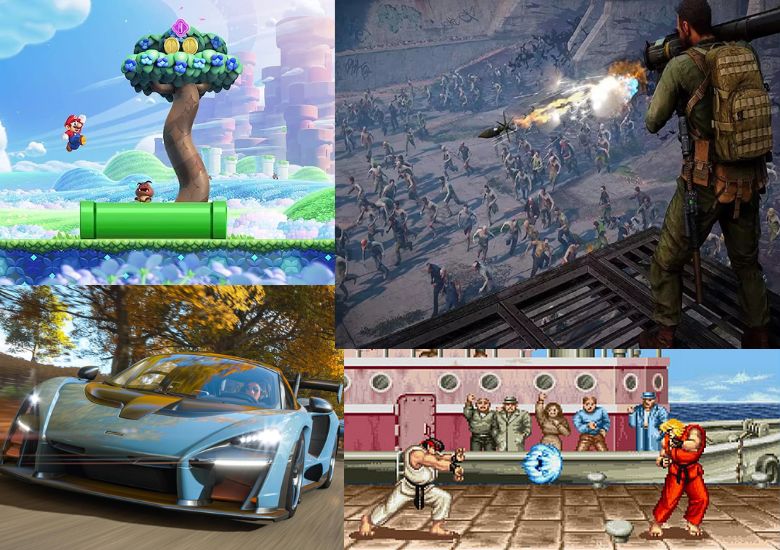
Start by researching various gaming niches to identify the ones that interest you the most. Gaming is a vast industry, encompassing genres like RPGs, MMOs, first-person shooters, strategy games, esports, and more. Each niche has its unique characteristics, player base, and potential for growth. Explore different gaming communities, forums, and social media platforms to gauge the popularity and engagement of various niches.
2. Assess Your Interests and Expertise
Consider your own gaming preferences and expertise. Are you more inclined towards a particular genre or style of games? Do you possess in-depth knowledge about certain games or gaming platforms? Your passion and expertise in a specific niche will significantly influence the quality of content you create and how well you connect with your audience.
For me, I started Nerd Much? because I knew everything there is to know about MMOs, FPS, and horror games – as these were the games I tended to play the most when we launched in 2015.
You’ll also notice that we cover more than just video games because I’m also a lover of all things sci-fi and fantasy – which includes books, TV shows, and movies, too.
3. Identify Market Demand
While choosing a niche based on your interests is essential, it’s equally vital to evaluate its market demand. A highly specialized niche with a small audience might limit your website’s growth potential, while a highly saturated niche might make it challenging to stand out. Strike a balance by opting for a niche that aligns with your interests and has a reasonable potential for attracting a substantial audience.
You can find out if your specific gaming niche is popular enough to support an entire blog by using SEO tools like Mangool’s KWFinder or even Google’s own Trends.
4. Research Competitors
Once you have narrowed down your potential gaming niche, research other websites and platforms catering to the same audience. Analyze their content, design, user engagement, and unique selling points. Understanding what other gaming websites are doing will help you identify gaps in the market that you can leverage to make your video game website stand out.
5. Define Your Unique Selling Proposition (USP)
To set your gaming website apart from every other gaming website out there, define a clear and compelling Unique Selling Proposition (USP). Your USP is the distinct value or benefit that your website offers to visitors. It could be exceptional content, a vibrant community, exclusive game reviews, or any other feature that makes your website the go-to destination for your target audience.
For Nerd Much?, we launched with our focus being nerdy blog content and opinions but also a Cool Stuff category that is presented as a product discovery section (for nerds, of course).
6. Create User Personas For Potential Blog Readers
User personas are fictional representations of your ideal website visitors. Based on your niche and research, develop detailed user personas that include demographics, gaming preferences, behavior, and goals. This process will help you create content and features that cater directly to the needs and interests of your target audience.
7. Tailor Content and Features to That Audience
Based on your research and user personas, tailor your website’s content and features to align with your audience’s preferences. For example, if your target audience consists of esports enthusiasts, prioritize content related to esports events, strategies, and news. Customizing your website to suit your audience’s preferences will foster a sense of belonging and encourage repeat visits.
I know I know – it sounds like a lot (and it is). But by investing time and effort in defining your niche and understanding your target audience, you set a solid foundation for your gaming website and it’s going to help you carve out space in the crowded niche. In fact, this clarity will influence various aspects of your website’s development, design, and content strategy, ultimately contributing to its success and growth within the gaming community.
Step 2: Picking a Domain Name and Hosting

Selecting the right domain name that you actually like and a hosting provider is a critical step in building a gaming website. I can tell you, one of the hardest parts about starting Nerd Much? was for us to come up with a branded name that wasn’t already taken. IT’s tough because the niche is so competitive and there are already so many different gaming content sites, so a lot of the best names are already taken. Here’s a comprehensive guide to choosing a gaming domain that’ll ‘work’:
1. Reflect Your Gaming Brand
Your domain name should reflect your gaming brand and niche. Aim for a name that is catchy, easy to remember, and directly related to gaming. Although Google just recently stated that branded domains are better than non-branded domains, consider incorporating keywords relevant to your niche to improve search engine optimization and visibility. You’ll want to keep your domain as short as possible and avoid using hyphens or special characters to make it more memorable.
Liz (my partner) and I chose ‘nerdmuch.com’ because we cover everything nerd-related (books, movies, games, etc.), so I didn’t want any gaming terms in our domain. So if you’re planning to veer away from covering just video games, you might want to just skip putting any gaming keywords in the URL.
2. Conduct Some Quick Keyword Research
Getting a domain name containing a potential search keyword to target is super tough, especially in the gaming niche. I highly recommend doing some keyword research to see if you can snag a keyword and create a domain name around it.
My personal preference for doing quick and easy keyword research is to use Mangools KWFinder. It’s super quick and intuitive to use, and it will suggest related keywords, questions, and other information surrounding your potential targetted keyword.
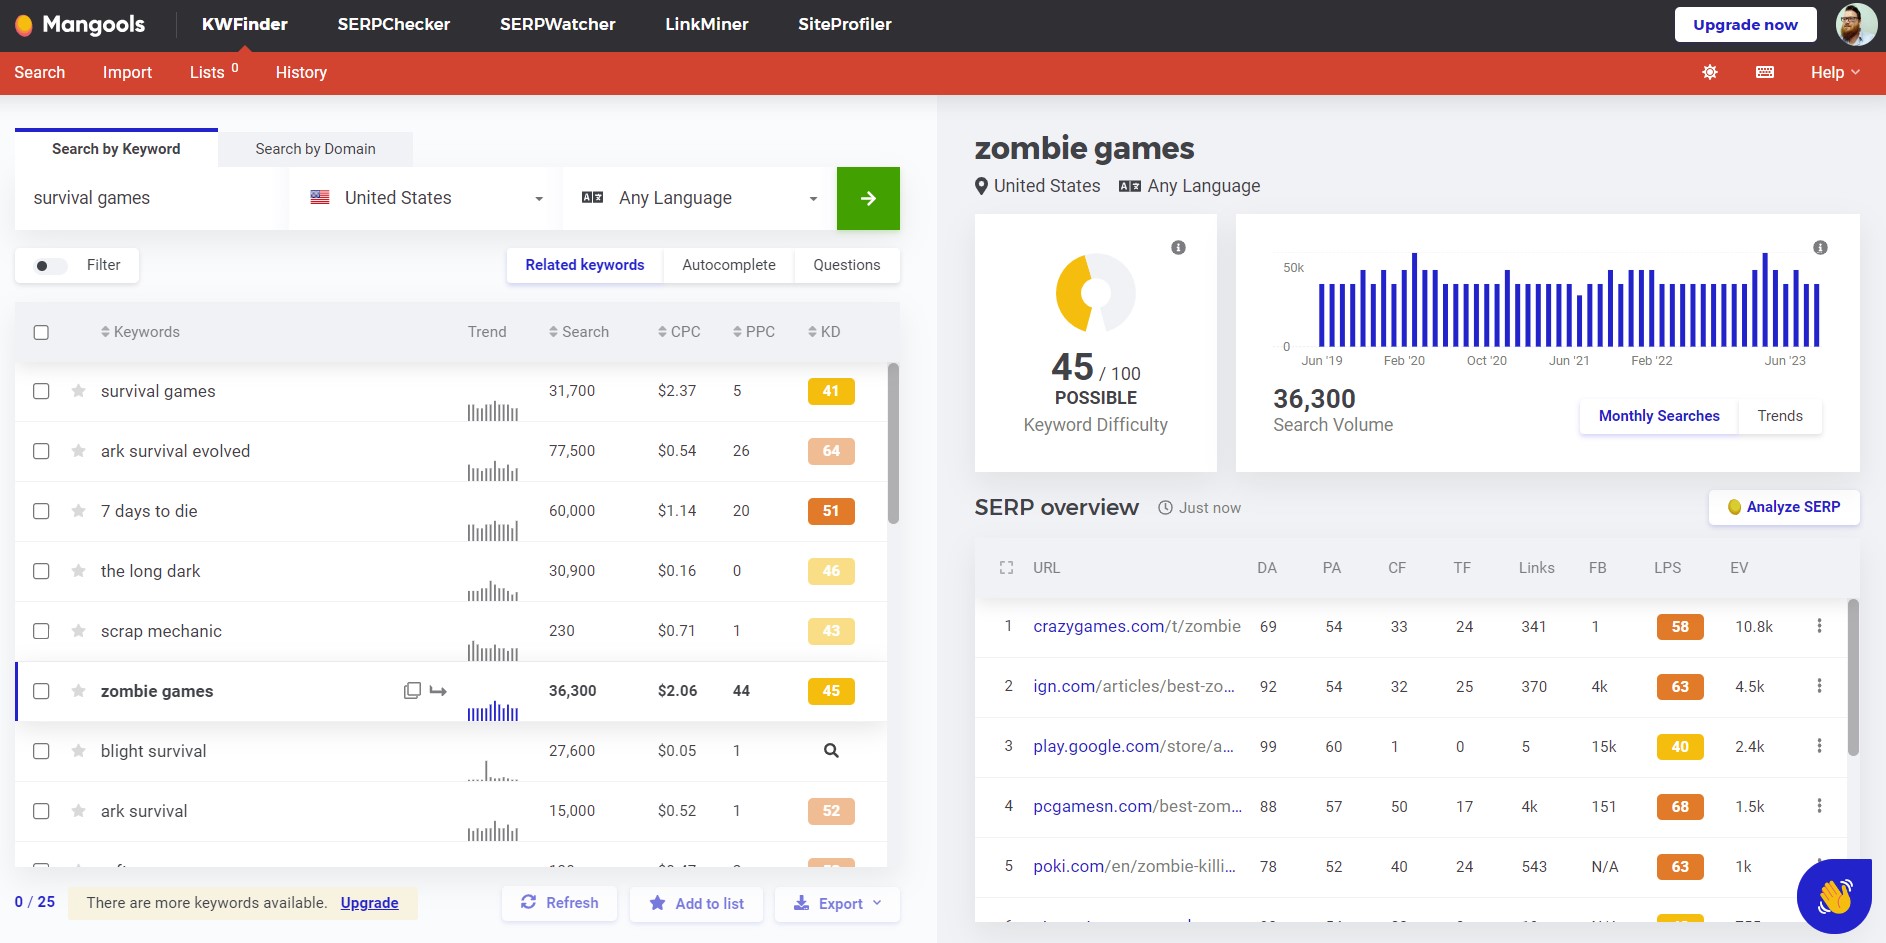
There’s also a 10-day free trial plan available so that you can perform some preliminary keyword research.
Getting serious about SEO from the get-go is definitely the way to go, so if you have the budget for a keyword tool, go with Mangools.
If You’re Stuck, Use a Domain Name Generator
If you’re having trouble coming up with a cool domain name that fits, try using domain name generators (like this one from Namecheap). These online tools can suggest creative and available domain names based on your niche and preferred keywords. Experiment with various options until you find one that resonates with your brand.
3. Check Availability and Trademarks
Before finalizing a domain name, check its availability and whether it has any trademark conflicts. Use BigScoots or Namecheap to search for the availability of your desired domain name. Additionally, check for any trademark registrations or disputes to avoid legal issues in the future.
And unless your site is for some sort of gaming app, you’re going to want a .com domain (not .net or .gg or .gaming or anything cutesy like that).
Choosing a Hosting Provider
I’m just going to do the work for you and tell you that BigScoots is the way to go when it comes to hosting providers. Nerdmuch.com has been on BigScoots for many years now, following numerous trial and error testing on other platforms. For under $40/month, you can get their Starter WordPress optimized hosting for your new site. Trust me when I tell you that you won’t find hosting as good for the price. And once you get over 250K monthly pageviews, you can easily upgrade to the next tier.
Get a BigScoots Hosting Plan here.
Choosing the right domain name and hosting provider requires careful consideration and research. Your domain name represents your gaming brand, and your hosting provider is the backbone of your website’s performance and stability. By taking the time to find a domain name that resonates with your niche and selecting a reliable hosting provider that meets your website’s requirements, you set the stage for a successful gaming website that can effectively connect with your target audience and provide an enjoyable gaming experience.
Step 3: Choosing a Content Management System (CMS)

I’m going to make Step 3 super easy for you. Unless you’re planning a gaming-related online shop of some sort, I always recommend WordPress as a CMS. It’s SO easy to use, and most of your issues you can handle on your own (without any coding!). There are all sorts of plugins you can add to your site too, whether you’re looking to improve your site’s speed or add more functionality to it.
But if you are planning to have an online shop of some sort, the easiest option is Shopify.
If you’re unsure whether or not you’re going to add a shop to your site, then you’ll want to stick with WordPress, as you can always add a plugin like WooCommerce later on down the line.
Step 4: Designing Your Website
Designing your website so that it’s intuitive, unique, and, well, cool-looking is essential to your future success, but it’s important to note that you can always easily redesign in the future.
If you’re just starting out and designing your site in WordPress, your best bet is to check out Theme Forest. Theme Forest will help you find a theme that is in your niche, highly customizable, and optimized for search engines (which is important for getting traffic). We are using a highly customized version of the Newspaper theme by Tagdiv, but the key ingredient you’re looking for when browsing for a theme is speed, especially when it comes to mobile optimization.
When designing your site, here are a few things you want to keep in mind beforehand:
- Accessibility: Make your gaming website accessible to all users, including those with disabilities. Incorporate alt text for images, provide keyboard navigation, and ensure color contrast is sufficient for readability.
- Test the User Experience (UX): User experience is paramount for the success of any website. Conduct usability testing to identify any design flaws, broken links, or issues with navigation. Focus on mobile design first, and then refine your desktop theme.
- If you’re not experienced in web design, take a look at a color palette creator like coolors.co to generate your brand colors and find a group of colors you like.
- For your logo/favicon and all of that stuff, you can use something like Canva or Photoshop to design your own. You can also get pretty cheap logo design on Fiverr or Upwork. Our logo (the cool little TV head gamer in the top left corner and the bottom of your screen) was designed by one of my childhood best friends at Five Line Designs (which he owns).
Step 5: Creating Essential Pages
There are certain pages on your site that are going to be essential to your launch. Here is a list of the essential pages you need to create for your site before you even launch it:
- Homepage: The homepage is the gateway to your gaming website and acts as the first impression for visitors. Design a visually appealing and informative homepage that showcases your gaming brand, niche, and what you’re all about. Include a brief introduction, captivating hero images or sliders, featured games, and essential navigation elements.
- Game Pages (If you plan to focus on specific games, create hub pages for those games).
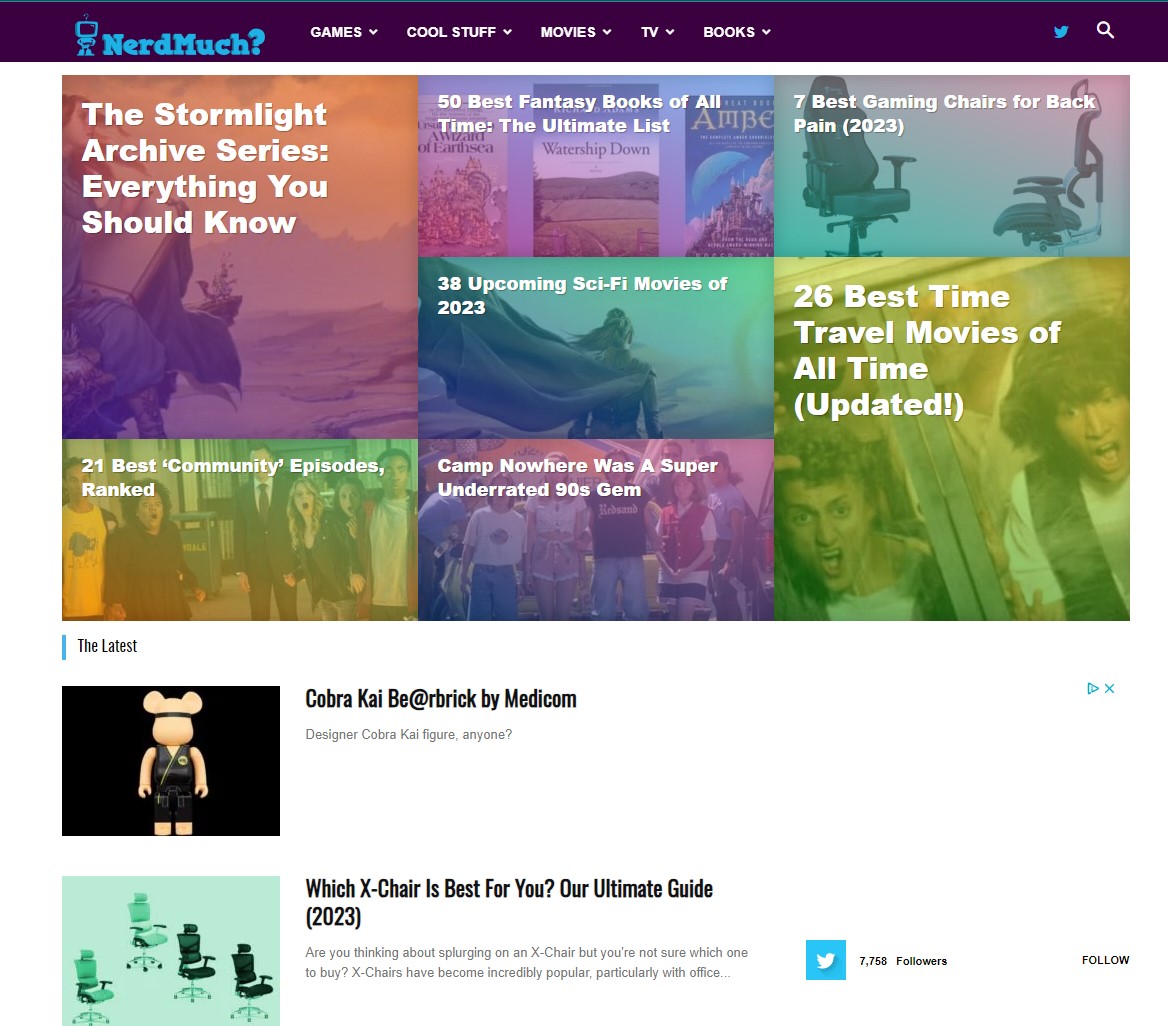
- About Us: allows you to introduce your gaming website to visitors and share your mission, vision, and team members. Explain your passion for gaming, the inspiration behind starting the website, and the goals you aim to achieve. Personalize the page to connect with your audience and build trust. Check out Nerd Much’s About Us page as an example.
- Contact Us: essential for user inquiries, feedback, and potential collaborations. Provide multiple contact options, such as a contact form, email address, and social media links. You could also integrate your Discord links if you are looking to create a Discord for your community.
- Privacy Policy and Terms of Service: Create a privacy policy and terms of service page to outline how user data is collected, used, and protected on your website. Ensure compliance with data protection regulations and reassure visitors about their privacy and security.
- Sitemap HTML: You should have a sitemap HTML page. Use the Simple Sitemap WordPress plugin to accomplish this.
Step 6: Content Creation and Strategy
Content creation and strategy are at the heart of building a successful gaming website that’s going to actually generate a user base and, therefore, revenue (don’t worry; we’ll get to generating revenue later in this article). Compelling and valuable content is what attracts and retains visitors, drives organic traffic, and positions your website as an authority in the gaming community. To create a content strategy that resonates with your audience, follow these essential steps:
Define Your Content Goals
Start by defining clear content goals for your gaming website. Are you aiming to entertain, educate, or inform your audience? Do you want to promote specific games, increase user engagement, or drive affiliate sales? Understanding your content objectives will guide the type of content you create and the gaming topics you cover.
Identify Your Target Audience’s Interests
To create content that engages your niche’s audience, identify their interests, pain points, and preferences. Analyze user behavior and monitor popular gaming trends to gain insights into what topics and gaming genres resonate most with your audience.
(Again, you can use Mangools KWFinder or something like Google Trends to keep your finger on the pulse).
Diversify Your Content Types
Create many different content types to cater to different audience preferences. Consider game reviews, walkthroughs, tutorials, opinion pieces, interviews with game developers, and industry news. Variety will keep your website engaging and attract a wider audience. You can serve the latest gaming news-seeking readers as well as shoppers looking for the best wireless gaming headsets.
SEO-Optimized Content
Trust me when I tell you that your site is going nowhere without search engine optimization. Search engine optimization (SEO) techniques are intended to improve your website’s visibility in search engine results. Research relevant keywords and use them strategically in your content, titles, meta tags, and image alt text. High-ranking content will attract more organic traffic to your website. I’m thinking about creating an SEO for gaming websites series in the future, but for now, if you want to read more about the basics of SEO (including tons of helpful tips), check out Backlinko.
Use a Content Calendar
Create a content calendar to plan and organize your evergreen content publishing schedule. Consistency is key, so establish a regular posting frequency that aligns with your audience’s expectations. A content calendar helps you stay on track, avoid content gaps, and plan content around gaming events and releases. Obviously, if you’re a gaming news website, you’re going to want to make sure you include breaking news in that calendar.
There are quite a few different types of content calendar tools you can use for planning. You can go super basic with your planning and just use Google Calendar and Sheets/Excel, or you can use something like Trello or Asana that is a bit more advanced.
Add Visual Appeal
Incorporate visually appealing elements into your content, such as high-quality screenshots and videos. Visuals enhance the user experience and make your content more shareable on social media platforms. And, it often helps with your SEO efforts, especially if you’re including gameplay videos or video game trailers in your content.
Stay Updated with Gaming Trends
The gaming industry is ever-evolving, with new games, technologies, and trends emerging regularly. Stay updated with gaming news, releases, and community discussions to create timely and relevant content that captures the interest of your audience. Game Informer keeps a great, lengthy list of video game releases coming soon that they keep up-to-date.
Be Authentic and Passionate
Above all, don’t try to bullshit the gaming community. Be authentic and passionate about the content you create. You can definitely tell when a writer is talking about something they have no idea about, and the reverse is also true. Your love for gaming should shine through your content, and genuine enthusiasm will resonate with your audience. Share your experiences, insights, and thoughts with your readers to build a strong connection with them.
Step 7: How to Monetize Your Gaming Site
Monetizing your video game website is a way to generate revenue while providing valuable content and services to your audience. However, it’s essential to strike a balance between monetization and user experience to avoid alienating your visitors. Explore these various monetization options to find the best fit for your gaming website:
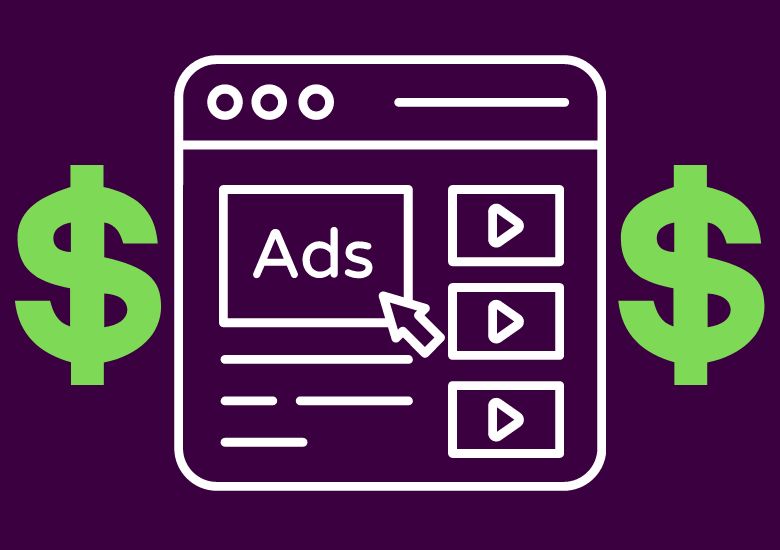
Serving Ads on Your Gaming Website
One of the most common ways to monetize a video game website is through advertising. You can display banner ads, pop-ups, or native ads from ad networks like Google AdSense, Raptive, Media.Net, Ezoic, and many others.
Obviously, when you’re just starting out, you’re not going to be able to monetize as well as you can when you start hitting bigger traffic numbers. I always recommend signing up for Google Adsense to start, and then when you hit 10,000, switch over to Ezoic. It’s important to note that you won’t make very much from either Adsense or Ezoic, but they’re the best networks for low-traffic sites because of their low barrier to entry.
Once you hit 100,000 monthly uniques, you should be able to sign-up for Raptive (formerly Cafe Media formerly AdThrive) and begin earning substantially more ad revenue. Don’t quote me on their barrier to entry, but as they’ve just taken over Cafe Media, I’d imagine their audience threshold for joining is the same.
Affiliate Marketing Revenue
Affiliate marketing allows you to earn a commission by promoting products or services related to gaming. Partner with gaming companies, online game stores, or gaming gear manufacturers and include affiliate links in your content. Earn a commission when users make purchases after clicking on your affiliate links within your articles.
There are thousands and thousands of affiliate networks out there that you can sign up for to find profitable gaming affiliate partners. Check out Commission Junction, Shareasale, and Impact Radius to start. Amazon Affiliates is also one of the easiest and most lucrative affiliate platforms to use.
Sponsored Content
Consider partnering with game developers, publishers, or gaming brands to create sponsored content. Sponsored content can include promotional articles, videos, or sponsored posts on social media. Be transparent with your audience about sponsored content to maintain trust and follow FTC guidelines.
Subscriptions
Implement a subscription-based model that offers premium access to specific features or ad-free browsing for a monthly or annual fee. Ensure the subscription benefits align with your audience’s preferences and needs. In order for this to generate any sort of revenue for you, you’re going to need to build up a following and get returning users.
Monitor Analytics and Feedback: Regularly monitor content performance using website analytics tools. Analyze which content attracts the most visitors, engages users, and leads to conversions. Use this data to refine your content strategy and focus on creating more of what resonates with your audience.
Step 8: Implementing SEO Best Practices

Search Engine Optimization (SEO) is essential for driving organic traffic to your gaming website, and it’s going to be your main source of traffic when you’re just starting out. By following SEO best practices, you can improve your website’s visibility on search engine result pages and attract more visitors interested in gaming content.
Your first plan of action should be to download an SEO plugin for your WordPress site (I recommend Yoast, as it’s the most widely used and will give you actionable insights during the content creation process.
Here’s a basic guide to implementing SEO for your gaming website before you launch it:
Keyword Research
Begin by conducting thorough keyword research to identify the search terms and phrases relevant to your gaming niche. Use keyword research tools (again, I recommend Mangools KWFinder) to find high-traffic, low-competition keywords that align with your content. Focus on long-tail keywords that reflect specific gaming topics and user intent.
On-Page Optimization
Optimize your website’s on-page elements to make it more search engine-friendly. Include target keywords in the page titles, meta descriptions, headings (H1, H2, etc.), and throughout the content. However, avoid keyword stuffing, as it can negatively impact user experience and SEO rankings.
High-Quality Content
Create high-quality and engaging content that provides value to your target audience. Well-written articles, in-depth game reviews, and informative tutorials will attract more organic traffic and encourage visitors to spend more time on your website.
Mobile Responsiveness
Ensure your gaming website is mobile-responsive and displays correctly on various devices, including smartphones and tablets. Mobile-friendliness is a crucial factor for SEO, as search engines prioritize mobile-optimized sites in their rankings.
Page Loading Speed
Optimize your website’s loading speed to enhance user experience and improve SEO rankings. Compress images, leverage browser caching, and use a content delivery network (CDN) to reduce page loading times.
Internal Linking
Implement a strategic internal linking structure to connect related pages and guide users through your website. Internal links help search engines understand the hierarchy and relevance of your content, which can positively impact your gaming site’s search rankings.
External Linking and Backlinks
Link to authoritative and relevant external sources to provide additional value to your readers. Additionally, work on building high-quality backlinks from reputable websites within the gaming industry. Backlinks from other trusted sites signal to search engines that your website is credible and worthy of higher rankings.
Social Media Integration
Integrate social media buttons on your website to encourage visitors to share your content on various platforms. Social signals, such as likes, shares, and comments, indirectly influence SEO rankings and increase your website’s visibility.
Utilize Rich Snippets and Schema Markup
Implement rich snippets and schema markup to enhance your website’s appearance on search engine results pages (SERPs). Rich snippets provide additional information, such as star ratings and review counts, which can increase click-through rates and improve organic traffic.
Regular Content Updates
Consistently updating your website with fresh and relevant content is the key to victory. Regularly publishing new articles, game reviews, and gaming news signals to search engines that your website is active and provides up-to-date information.
After you get your sea legs under you and start analyzing what content is working vs. what isn’t, you’ll be able to see which content you should focus your efforts on more.
Step 9: Setup Tracking and Monitoring
![]()
Monitor Analytics and Adjust Strategies
Regularly monitor your website’s performance using analytics tools such as Google Analytics and Google Search Console. At a bare minimum, these two Google products are essential (don’t worry – they’re free to use). Find out what content is working and what content isn’t. Use this data to adjust your SEO strategies and content creation efforts.
How to Setup Google Search Console For Your Site
Here’s a quick step-by-step process for creating a Google Search Console account for your website:
- Go to the Google Search Console website: Visit https://search.google.com/search-console and sign in with your Google account.
- Add a Property: Click on the “Add Property” button and enter your website’s URL (e.g., https://www.example.com). Make sure to use the exact URL that you want to track in the Search Console.
- Verify Ownership: There are multiple methods for verifying ownership of your website. Choose one of the verification methods provided by Google, such as adding an HTML tag to your website’s homepage or uploading an HTML file to your website’s root directory.
- Verify Successful Verification: After implementing the chosen verification method, click the “Verify” button. Google will check for the verification code or file on your website to confirm ownership.
- Access Your Search Console Dashboard: Once verified, you will be directed to your Search Console dashboard. Here, you can see important data about your website’s performance in Google Search, including search queries, clicks, impressions, and more.
- Submit a Sitemap (Optional): To help Google index your website more effectively, you can submit a sitemap. If you have one, go to the “Sitemaps” section in the sidebar and submit your sitemap URL.
- Set Preferences and Monitor Data: Customize your Search Console preferences and explore the various sections to monitor your website’s performance, identify potential issues, and optimize for better search visibility.
Boom, you’re done with that step.
How to Setup Google Analytics For Your Site
Here’s a quick step-by-step process for creating a Google Analytics account for your website:
- Go to the Google Analytics website: and sign in with your Google account. If you don’t have a Google account, you’ll need to create one.
- Set up a new account: Click on the “Start for free” button to create a new Google Analytics account.
- Fill in Account Information: Provide the required information for your account, including the Account Name, Website Name, Website URL, Industry Category, and Reporting Time Zone.
- Select Data Sharing Settings: Choose your data sharing preferences based on your comfort level. Read through the options and check or uncheck the boxes as per your preference.
- Get the Tracking ID: After setting up the account, you’ll be directed to a page with your unique Tracking ID and tracking code. Copy the provided tracking code.
- Implement the Tracking Code: Paste the tracking code just before the closing </head> tag of your website’s HTML code. This code allows Google Analytics to track visitors and their behavior on your website.
- Verify Tracking Code Installation: Once the tracking code is implemented, go back to the Google Analytics page and click the “I’ve installed the tracking code” button to verify its installation.
- Access Your Analytics Dashboard: After verification, you’ll be taken to your Google Analytics dashboard. Here, you can access valuable data and insights about your website’s performance, user behavior, traffic sources, and more.
Congratulations! You’ve successfully created a Google Analytics account for your website. Keep an eye on your analytics dashboard regularly to gain valuable insights into your website’s performance and make data-driven decisions to enhance user experience and achieve your website’s goals.
Step 10: Write Content, Write Content, Write Content, And Then Write More Content

After you’ve done your keyword research and you’ve got all of Steps 1-10 complete, your next focus should be to just write great content – and A LOT of it. To start, try crafting articles around keywords in your specific gaming niche that have a low keyword difficulty. Naturally, you’ll want to find low keyword difficulty terms that also have medium to high keyword search volume.
When we first started out at Nerd Much?, I was writing content left and right whenever I had a free moment. While the water was boiling on the stove for some mac n cheese, I was writing content. While my wife was inside the doctor’s office, I was in the car writing content. While the kids were in their karate classes, I was writing content while I waited for them to finish. I know that not everyone has that sort of workaholic mentality that I do, but you really should be trying to load your site up with great content as quickly as possible.
In fact, one of the very first posts I created (which of course has been updated frequently since) still remains our #1 money-making post.
Now is the time for you to experiment with different content types and ideas you might have before your website starts to get a big following. The sooner you figure out exactly what kind of content your website is going to provide, the quicker you can lean into that idea and expand on it to fill your site with great content.
What Do You Need to Make Gaming Videos For Your Site?
Depending on what sort of video games you’re going to focus on, you’ll find different solutions for making gaming videos. For PC games, you can use software like Streamlabs or OBS. For console games (Xbox, PS5, Nintendo, etc), you will need a game capture card. I’d also recommend a good headset and microphone (something like a HyperX Quadcast S will do just fine).
What Makes Me Qualified to Write This Article?
Not only have I been running the entirety of my own website for over eight years now, I have also helped hundreds of hopeful webmasters create their own websites in various niches, including in the games niche. I’ve been writing in the games niche for over 10 years, and I have been an SEO consultant for over 12 years.
Please, if you use this article to start your own site, I’d love for you to follow me on Twitter/X/whatever the hell it’s called right now.
Tips & Things You Want to Avoid
- Don’t sell links on your site. Shortly after you create your site, you’ll start to get an influx of emails asking you to place a link on your site for a small fee. Tell them no, as it’s against the Terms of Services for Google and will likely result in your site getting penalized.
- Conversely, don’t BUY links to your site, either. Same reason.
- Use Grammarly when you’re writing. It helps tremendously, and nothing turns off new followers like poorly written articles.
- Post your site link on all of your social media accounts, including Linkedin. This is a great way to generate a small bit of traffic and grow a potential viewership.
- You’ll definitely want to start capturing email subscribers from the getgo to start a weekly newsletter. These users can become an essential tool for generating traffic in the future.
- If you have affiliate content on your site, you’ll want to include an affiliate link disclaimer on every article.
- If you do go the WordPress route, here are a few handy plugins that you might find useful:
- Converter for Media by matt plugins: Speed up your website with WebP and AVIF image formats. This will greatly reduce the size of your webpages.
- Redirection: Anytime you delete a page/post on your website, you’re going to want to redirect the old URL to something else (typically the closest most relevant content). To do that, use the Redirection plugin by John Godley.
- Yoast SEO: SEO plugin.
- WP Rocket: This will speed up your WordPress website tremendously by minifying css, JS, HTML, Lazy Loading, and so much more. Well worth it.


